06 May 2011
(read Part One here)

After Greg delivered the old shed onto my driveway it sat there for close to nine months. I was too busy to clear the road to the chicken yard, and Greg apparently didn’t need his trailer back, because he never called me to demand that we finish moving it.
Even braced and tied to a tree, the shed was not stable on top of the trailer. When Greg and Jesus had been cleaning up after delivering the shed I had gone to look inside to get a closer look. I put my hands on the door sill, and the shed leaned over toward me with a loud creak. I started backward like I had been burned and darted well away from the crush zone. The shed rocked back to level. “Whatever you do,” Greg warned me, ” do not get into the shed!”
I was too frightened to get into the shed. But once in a while I would go out onto the driveway and look into the shed. Greg had emptied the shelves of everything but the dirt, of which there was a lot, and the kerosene smell inside was quite strong. But I had been right in my initial assessment; the shed was sturdily built, entirely of redwood, whitewashed on the inside, and huge. The door was a pretty light blue and although it didn’t open very well it did open. The shed was sound. It would make an awesome chicken coop when it was done. If I ever managed to get it down off of the trailer.
I started thinking. Even if I cleared the road to the chicken yard it was going to be tough to get the shed up into the right spot; the road was narrow, and uneven, and to even get to the road would require maneuvering the shed past the garage and through a carport that was, unfortunately, shorter than the shed. The magic 8 ball in my head was blinking FAIL. I was going to have to dismantle the shed, and take it up to the chicken yard in pieces.
In December I got up on a ladder with a crowbar and a hammer. On top of the roof I found four layers of rotting asphalt shingles and redwood 1x6s as underlayment. Slowly I started building a messy pile of asphalt and roofing nails and lumber on the ground next to the shed. Once I had a few rows of roofing materials off, I moved the ladder inside the shed itself.
“Do not get into the shed!” Greg had warned me nine months before. It’s usually good advice that if some activity scares Greg then that activity is probably way, way too dangerous for anyone other than Greg to attempt. But I was confident at this point that the shed was not going to tip over. I had been testing the shed by going out and wiggling it once in a while (and then running away). Like a Weeble, it wobbled, but it didn’t fall down. I could tip it several degrees off center on the trailer, but it seemed to want to come back to vertical every time. Leaning the ladder against it had proved stable. I was feeling more confident.
Lack of imminent death didn’t mean it was at all easy to stand on a ladder inside of it, or that I had any fun at all standing on that ladder. The shed still listed from side to side as I worked, like a small boat in a very big storm. If I didn’t move very slowly as I worked, or have the ladder oriented in the right direction, the shed could lurch, leaving me hanging on a rafter with my feet dangling in the air. There were a number of times I finished working on the shed for the day and staggered queasily inside to take a dramamine and lie down for a while.
It took me a week of afternoons and a weekend to get the roof fully off.


I could stand on the ground to pull off most of the siding. As it fell around me a lot of it splintered from rot. The light blue panel door came right off its hinges, and then came apart. Underneath the siding I found more rot, rot in the framing, and rot in the foundation. My free shed was looking like less of a good deal. Every time I stuck my crowbar deep into a chunk of wood that peeled away in shreds I became slightly more uneasy. What, exactly, had I signed up for?

Taking down the rafters took me another two weeks, because they had no rot whatsoever and were nailed down with giant eight-inch spikes. Whoever had built my shed years before had planned for those rafters to stay put, maybe forever. I got most of them off with persistent prying and cursing, and a few by cutting through the spikes with the Sawz-All that Eric got me for my birthday a few years back. Some girls get jewelry. I get power tools.
The next step was to take apart the frame of the shed, and I wasn’t altogether sure how to do that, given that each wall was nailed tightly to the floor and to each other, and I didn’t want to destroy them to take them down. I was still puzzling over the problem when Greg came back up to the house to do some tree trimming.
“Wow!” He said when he saw the skeleton of the shed up on his trailer. “You’ve done so much work!”
I explained what I was up to, and my plans for the rest of the shed demolition. I told him that when I finished taking it apart that he could have his trailer back, but I wasn’t sure how long it would take me. Greg looked at the shed. He looked at me. He got that look on his face that usually makes me back away in alarm. “Let’s just take it down now!” he exclaimed.
“Now?” I asked, backing away in alarm. “Right now?”
“Yeah! It’ll take like fifteen minutes!”
I watched as Greg snatched a hammer out of the back of his truck, jumped up into the shed, muttered “whoa!” once as it heaved underneath him like a bull, and then fearlessly began to pry at the corners of the framing. Within minutes all four corners were loose, and then with the help of a rope and some further prying we had lowered all four walls outward down to the ground. The shed looked like it had been exploded outward.
With some heaving and 2x4s as levers we managed to push the shed foundation off to one side of the shed, and flip it upside down on the ground. Greg hooked up his truck to the trailer and moved it out of the way, and then we picked up the foundation and turned it back right side up onto the ground.
He was right. In less than half an hour the shed was in parts on the ground. We had made more progress together than I had in weeks. Greg trimmed his trees and left with his trailer, leaving me with a stack of wood on the ground. Shed demo was done. Now it was time to rebuild.

(Continued…in Part Three)
20 Apr 2011

About a year ago we went down the hill one afternoon to visit with our neighbor Greg. While we were there, Greg pointed out the improvements he had made to his house, taught us how to douse for water with two bits of coat hanger held in the hands, showed us the decrepit 5000-gallon redwood water tank he had been restoring, took us out in the woods to see the really awesome skeleton of a deer he had found, and noted offhandedly as we walked back that just the week before he had accidentally rolled his Jeep over the sharp edge of the trail and it had taken him a couple hours to get it hauled back up again.
We can never visit with Greg for less than half a day. Greg always has so many interesting stories to tell and so many things to show us, although a large portion of them scare the living daylights out of me. In past lives, I imagine Greg has been a pirate, a gunslinger, a flying ace, or a lion tamer. Greg operates at a very high RPM. Everything Greg says is emphatic. Greg is the number one living example of the power of positive thinking. “Did you get hurt rolling the Jeep?” I asked. “Oh no!” said Greg, cheerfully. “A little shook up, but it was fine! I just crawled out and went to get the winch!”
“Did the Jeep get badly damaged?”
“No more than any other time I’ve rolled it!”
Toward the end of the visit Greg pointed out a huge old shed he had down on the side of his driveway below the house. The shed was ugly and crammed full of boxes and paint cans and bits of metal. It smelled like kerosene. It looked like it was rotting away one side and not entirely water tight. The door was crooked and it didn’t shut all the way. “That shed has been here since I moved in!” Greg exclaimed as we passed by. “Someday I need to get rid of it! I could use the space!”
I looked back at the shed. Although the siding was rotting it was still standing upright. Behind all the junk, it looked like redwood. “You know,” I said. “If you could find a way to get the shed up to our house, I’d take it.”
“Really!” Greg exclaimed.
“Yeah,” I replied. “I need a bigger chicken coop.”
“Really!” Greg repeated. “That would be awesome! I’ll clean it out and see if I can get it up on a trailer!”
“Oh, no rush,” I said. “The chickens aren’t going anywhere.”
There’s kind of a a rule amongst chicken people that says once you get a couple of chickens you’re always going to want more chickens. If you’re not careful you end up collecting them, like seashells or interesting rocks or t-shirts with embarrassingly nerdy slogans on them (“Roses are red, violets are blue, all my base are belong to you“). I started five years ago with three chickens, which grew to five, and then suddenly like that I had ten hens that laid eight eggs a day and ate all the weeds in the vegetable garden (as well as many of the vegetables). By the time I found Greg’s shed I had built a second chicken pen in the barn, in which there were 45 fat and happy meat chickens I was raising to eat.
I had long ago crossed the line from just keeping chickens into being an actual chicken farmer. (It could be argued that I had not only crossed it, I had charged it with my vast army of undead warrior bears and scattered the enemy in terror before me.) But because I was insane, I really needed more space so that I could get more chickens. I figured it would take Greg a few months to get the shed together, which would give me time to get ready.
And then the very next morning I got a call from Neighbor Greg. “Hi!” said Greg. “I cleaned out the shed and put it on a trailer! I thought maybe I could bring it up to your place sometime this morning!”
Uhhhhh I thought. That was way faster than I expected. “Uhhh, well, you can bring the shed up,” I replied, “But I’m not really ready — ”
“OK! Open the gate and I’ll be there in an hour!”
I anxiously walked down the hill some time later and there was Greg, slowly climbing the driveway in his big truck and with the shed swaying way, way, up on top of a narrow trailer. Jesus, Greg’s Mexican friend who helps him out with odd jobs, was down on the ground on the windward side, holding onto the shed with a rope tied to the roof to keep it from tipping right off the trailer and crashing onto the ground. When they turned a corner the other way, Jesus ran over to the other side of the shed and picked up another rope.
Oh my God, I thought, backing away back up the hill, this is so totally not OSHA compliant.
The shed on top of the unstable trailer was ten feet off the ground, which was taller than a number of the low-hanging branches on my driveway, so progress up the road was slow and Greg had to climb on top of the roof shed to do some guerilla tree trimming. Sure! Climb up ten feet in the air on an unstable platform with a chainsaw in one hand! What could go wrong!
But Greg’s astonishing and apparently bottomless pool of good luck served him just fine, and no one lost a limb or was crushed into pulp on the shed’s trip up to my house, most of which I spent standing well off to one side peeking through my fingers and making worried squeaking noises. “So!” Greg proclaimed triumphantly. “Where do you want us to put it!”
“I’m not ready,” I insisted. “The road to the chicken yard isn’t clear, and I have to take down the fence to make a space large enough to get the shed into the yard. You’ll have to leave it here and come back.”
Greg was crestfallen, but he agreed to tuck the shed into a corner of the driveway, still on top of the trailer, and come back later when I was better prepared. With Jesus’s help, he tied the shed to a tree and braced it with random bits of wood he had in his truck. Braced and tied the shed looked stable, but if you were brave you could still put one hand out and rock it on the trailer tires. In a strong wind you could see it shivering in place, as if the holes in its decaying siding weren’t keeping it warm enough.
And there the shed would sit for more than nine months.
(Continued…in Part Two)
15 Feb 2011

For a number of years now I’ve been making big batches of kimchi in the wintertime. I make it when the big heads of chinese cabbage start to show up in the farmer’s markets, sometime just before Christmas, and it lasts me in jars through to the spring. Like jam and pickles and applesauce, kimchi is one of the seasonal foods I look forward to making and putting away every year, and one that I give away to friends.
Kimchi is a traditional Korean pickle. Although you can make kimchi from a variety of vegetables, kimchi is most commonly associated with cabbage.
Stories abound of how the Koreans bury their kimchi pots in the ground in the fall and dig them up again in the spring, when the kimchi has well and truly rotted. I think westerners tell these stories because kimchi can have a very strong taste and smell, and that can be scary to a western palate used to blander food. Describing kimchi as a sort of zombie food that must be disinterred to be eaten seems to explain its more exotic and terrifying qualities.
Kimchi is not rotten. Like saukraut, kosher half-sour dill pickles, kefir, and sourdough starter, true kimchi is a fermented food. Although kimchi has a lot of chile pepper in it, its strong taste and smell comes mostly from natural yeasts and bacterias that develop over time in the mixture of vegetables in the pot. The kimchi pot does not need to be buried. Koreans traditionally buried the pot for the same reason root cellars exist; its easier to moderate the temperature of food underground if you don’t have artificial heating and cooling. No one does that any more.
This is how I make kimchi, based on a bunch of recipes I found on the internet years ago and adaptations I have made over the years. It requires about 45 minutes of actual work and 5-10 days of very casual tending. This isn’t an exact recipe, because I don’t precisely measure anything. My kimchi is different every year because of the amounts of things I have on hand and also because fermentation is not an exact science. There’s no way to duplicate it every time, to make it perfectly safe and uniform. That’s why it’s so special.
You Will Need
To make kimchi you will need:
1 3-4 lb head of chinese (napa) cabbage, chopped into 1-inch pieces
Salt
Water
1 small bunch of mustard greens, chopped
1 bunch scallions, chopped into 1-2 inch lengths
1 Daikon radish, grated, about a cup
1 carrot, grated, about a cup
1 1-inch section of ginger, grated
1 head of garlic (yes, I said a head. 4-5 big cloves, 7-8 small cloves), peeled and sliced thin
A little sugar
A little salt
1/3 cup of Korean powdered chile pepper
Some kimchi from a previous batch
A little water
The first time I tried to make kimchi I used plain western cabbage and cayenne pepper. Both of these were bad ideas. Western cabbage has entirely the wrong texture. Kimchi is not korean spicy coleslaw. Seek out real chinese cabbage, otherwise known as napa cabbage.
Make sure you also get actual korean powdered chile pepper. I tried using cayenne pepper and was surprised that my kimchi was too hot to eat. Kimchi is mildly spicy-hot, but most of the strength and the depth of the flavor comes from the fermentation, not from the peppers. I also tried other chiles and found that nothing tasted right until I actually went to a Korean market and got Korean chile powder. There’s something about the terroir. Fortunately, a huge jar of Korean chile pepper only costs a couple bucks.
You can get mustard greens from large fancy grocery stores these days, or from any Asian grocery. Don’t use the stems. You can leave these out if you can’t find them, but I find they really add an interesting taste.
Step 1. Salt
This step is optional. Salting the cabbage helps it release some moisture. You’ll end up with a limper less crunchy kimchi. I think it helps the kimchi ferment faster. If you’d prefer a more vegetable-tasting, crunchier kimchi, omit this step.
Layer the cabbage with salt in a big bowl or a plastic tub and cover with water. The water should taste slightly salty, like seawater. Add more salt if necessary Let sit for 4-5 hours, or overnight. Drain and rinse.
Step 2. Mix

Add the cabbage and all the remaining ingredients to the largest bowl you own and mix them all together. I like to mix the vegetables first with my hands, and then add the chile powder and a little water with a big spoon.

If you don’t have kimchi left over from a previous batch, that’s OK. You add a few spoonfuls to this batch as a “starter” to get this batch going faster with the right bacteria for the fermentation.
Step 3. Ferment
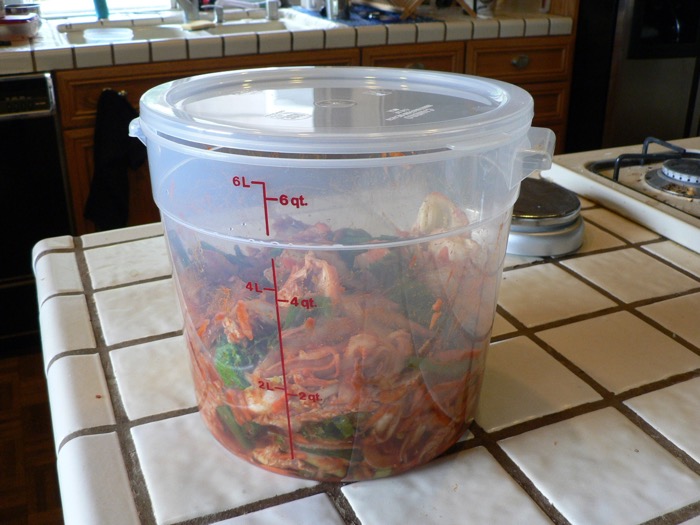
After mixing everything together, I put the kimchi into a tub and leave it out on the back porch to ferment. I used to use a stoneware pickle crock or glass half-gallon mason jars for this, but recently I discovered these food-safe plastic restaurant tubs and they’re a lot easier to keep clean and haul around. Don’t seal the top; you need it open a crack to let the good critters in there to do their work. Open in and stir it once a day or so.
How long you leave the kimchi out to ferment depends on how strong a taste you like and how nervous you are about letting food sit around unrefrigerated. A day or two in cool weather and you’ll get a very mild flavor, a crunchier kimchi, and you’ll still be able to taste the vegetables. A week in the sun and the kimchi will develop a spicy, sour, intense flavor, and look more pickled.
Why out on the porch? As the kimchi develops the smell will get stronger and more powerful, and an open jar of it can spread all over your kitchen like chemical warfare. I happen to like the smell, but others in your household may not agree.
Needless to say that if your kimchi turns a funny color or grows mold then your fermentation has failed and you should throw it out. I have never lost a batch but I can see it happening.
Don’t be afraid to experiment. Most of the years I made kimchi I only left it out for a few days. This last year I forgot about it entirely and rediscovered it out on the porch after ten days. I opened the jar and leaned over for a look and all the skin on my skull melted right off, like the Nazis at the end of Raiders of the Lost Ark. That was some really great stuff.